Sunday 25 November 2012

Best ever easy Christmas pudding Part One

My mother and grandmother used to make wonderful Christmas puddings. The real old fashioned ones in pudding cloths that were cooked in the laundry coppers. They were made about 6 weeks before Christmas and hung in airing cupboards. My dad used to refer to them as " the shrunken heads".
No wonder, as a child, I had nightmares.
This pudding is just as good and everyone thinks I make them in the old fashioned way. I must admit I have not been altogether truthful. However people have even told me that they know that they are made this way because they can taste the difference. Well I cheat, big confession, I make them in the microwave.
If I am organized I make them months in advance and freeze them but it doesn't matter if you don't. In fact I am starting mine today.
So first I put 450grams of mixed dried fruit in a glass or stainless steel bowl.


This 450grams is made up of whatever you prefer. Mine is made up of 250grams of mixed fruit, 80 grams of currants, 70grams of minced or finely chopped dried apricots and 50 grams of candied lemon peel. Then I pour over 1/2 cup of brandy and 1/2 cup of Port. Give it a good stir.


I cover the top tightly with plastic food wrap and leave in a cool place. Each day I will give it a good stir. If it has soaked up all the alcohol, I add a little more.
( my mother told me that every time my Dad passed the bowl he added more alcohol.). Her puddings were lethal! She ended up hiding them for this stage of this recipe.
Now I leave this for a week. The day I make the pudding I arrange for the family to be around and each person gives the mixture a stir and makes their Christmas wish. Those that cannot be here have been known to telephone and have me stir on their behalf whilst they make their wish. It's fun!


There is another tradition that I began when the children were small. As a child I remember finding silver threepence and sixpence coins in the pudding. It was very exciting but with the advent of decimal currency the coins could not be used. So I began putting a silver charm in my two daughters' slices just before I served them. The charm was always something to do with their interest or milestones that year. A silver music note when one learnt music, a silver tennis racquet when one took up tennis and so on. It has been a wonderful family tradition and the girls loved tracing their history of interests, hobbies and milestones on their bracelets.
See part two here:
http://mumskitchengarden.blogspot.com.au/2012/12/best-ever-easy-traditional-christmas.html

Growing and storing garlic


I love garlic and use lots in cooking. It is also an excellent plant as a companion plant for many other plants. The idea behind companion planting is that some plants can give off a smell or perfume that can deter pests or is attractive to natural predators. For instance planting onions with cabbages helps control cabbage moth. Garlic is credited with keeping aphids away from roses. I grow garlic with roses and so far have not had aphid attacks.
Garlic is also good to grow under fruit trees. It also excellent for making natural garden pest sprays.
A family friend who has the most amazing garlic crops, doesn't use garlic. She gives it to me. So this is what do, as I hate to waste it.


This is a photo of the top of a garlic plant when it forms the seed head and once it dries off it is time to harvest. I have pulled this one up to show even though it has not dried off. The tiny yellow pods you can see on the side of the bulb can be planted.


I clean the garlic by first removing the roots and as much dirt as I can, peeling off the outside layer of skin and then wiping it off under running water. Don't get it too wet. Allow it to dry completely on kitchen paper( usually overnight) If it is left wet it will go mouldy. Lots of bought garlic is treated to prevent this. If you are buying garlic and it is bright white and has a very distant use by date it would be worth asking if it has been bleached and treated with chemicals.


I keep my garlic in a bowl so that is always in the air not sealed up in plastic.
I hate washing garlic presses processing it reduces that problem. I break the garlic into cloves and peel off the dry outer skin. Make sure the bulbs are scrupulously clean if in doubt rinse them again, dry them off with some paper towel. Put them in a mini food processor and just cover with oil. I use the light vegetable oil that I would normally use for stir fries etc.


Process it till it is finely chopped. Sterilise a small clean jar that has a tight fitting lid. I do this by putting a little water in the jar, and of course minus the lid, I put the jar in the microwave on high for one minute. The jar will be very hot so be careful. Using you oven glove remove the jar, tip out the water. Don't dry it with a teatowel as it is now sterile. Put your processed garlic in the jar. Put a film of oil over the top and screw lid on tightly and store in fridge.


Always use a clean spoon to take garlic out, provided you keep your jar in the fridge this will keep for about four weeks.I keep doing small batches as I run out. The dry, clean garlic will keep for several months. Then, when making a stir fry or any other dish you are cooking just add the ready prepared garlic. This is not suitable for pestos as I prefer fresh garlic for all uncooked recipes.
Great time saver!
P.s. You can also do this with ginger but I have several ways to store ginger so that will be new post.
- Posted using BlogPress from my iPad

Wednesday 21 November 2012

Easy sweet pastry recipe for an apple pie


I never used to have a lot of success with sweet pastry.
The pastry was either so crumbly that when I tried to roll it out it just refused to cooperate. If I did manage to roll it out, when I tried to lift it to put it in the pie dish it tore. So my pies became something of a crazy patchwork with all the pieces pasted together. Not really a good look or experience. I usually wished I'd never started. All that mess and a poor result to show for it.
I found a very old recipe for " quick sweet pastry" in a book that my mother had kept. The book had disintegrated and had no cover but it was easy to see which recipes were the favorites because of the stains on the most well used pages.
I like to get all my ingredients ready before I start. Then I am not trying to open cupboards and containers with messy hands. I also get the rolling pin out and grease the pie dish.


Sweet pastry
1 tablespoon of butter
1 egg yolk ( beaten)add a half teaspoon of vanilla to this.
2 heaped tablespoons of raw sugar ( you can use white I just prefer to not used over refined products)
1/2 cup of milk
1 1/2 cups of SR flour ( I prefer organic white flour, I don't use whole meal because I find it makes the pastry too heavy). Extra to use when kneading and rolling pastry.

Put the butter, sugar and milk in a small saucepan or use the microwave.
All you want to do is melt the butter and dissolve the sugar. I prefer to use the stove so that I can stir it continuously to ensure it does not boil over or catch.
Once the sugar is dissolved ( and you can't feel it scratching on the bottom of the saucepan when you stir) and the butter is melted, remove it from the heat and allow to cool.
I am usually impatient and I just stand the saucepan on the sink for about 5 minutes. The recipe says add the egg to this but I have found if I have not been patient and tried to add the egg when the mixture is too hot it will begin to cook. And you don't want bits of cooked egg in your pastry !
So now I beat the egg and then add a little of the milk mixture at a time to the egg beating with a fork as I do it. That works really well.
Next I add the flour.
Stir this all together. Just get it mixed don't overwork the mixture or it will go tough. It looks like this in the bowl before I turn it out.


Turn the mixture out onto a floured board. I have a scoop ready in the flour so that I can get more to add. Otherwise you get pastry mixture all over everything.


Now I knead the pastry lightly for only about 40 seconds till it looks
Ike this. Add flour to the board as you knead it. Till it looks like this.


Now to make my pie I cut the pastry into two pieces. Obviously I need more for the bottom as I have to come up the sides of the dish.


Roll it out don't be heavy handed just medium pressure.
The easiest way to lift your rolled out pastry is to use the rolling pin itself.


Place the pastry in the pie dish,don't worry about the overhanging bits yet.
Gently press it into the pie dish.


Put in your preferred filling. I am using stewed Granny Smith apples. I have cooked them with sugar and cloves. I put the cloves in a tea infuser ball because whilst I don't care, some people object to finding whole cloves in the pie. I have not cooked the apple too much as they are going to cook more when I bake the pie. You don't want apple mush as a filling. I use a strainer spoon to lift the apples out of the liquid they have cooked in as I don't want any excess liquid in the pie otherwise the base will be soggy.
Next trim the edges of the pastry where this hangs over the edge of your pie plate. Add this pastry to the pastry you have reserved for the top.
Now dip your finger in water and gently moisten the edge of the pastry. When you put the top on this will make it stick together.

Now with the filling in and the edges moistened put the lid on the pie.


Now press around the edges with a fork. Looks very professional!


And with your fork make some ventilation holes, for the steam to escape, in the top of your pie. Lightly sprinkle some sugar on the top. Trim off any overhanging pastry.
You are ready to bake it now.
The great thing is, you can make this in advance in the morning and then bake it for the meal. However if you have put too much liquid in the base can go soggy.
Moderate oven for about 30-40 minutes on the middle shelf of your oven. All ovens are different so check your instruction book if in doubt.
A jug of cream and serve at they able. You will be a star!


- Posted using BlogPress from my iPad

Australian native birds beneficial in the garden

I love to encourage the native birds to come into the garden. Not only are they a joy to watch but they also control many predatory bugs in the garden.
From the tiny blue wrens


To the very busy Honeyeaters


To the lovely noisy parrots.


They all play their part in keeping the bugs under control and are welcome. But I do draw the line at their idea of sharing the fruit that I grow. So I net my trees and berry bushes


- Posted using BlogPress from my iPad

Tuesday 20 November 2012

Pests attacking basil seedlings

I think that the sap sucking,leaf eating bugs had sentries in the garden to alert them when I planted lush little basil seedlings. I would come out in the morning and find all that was left of my beautiful seedling was a mutilated stalk. I gave up trying to plant them in the open garden because they were obviously so irresistible to slugs, snails and others.
So I tried to get sneaky and put a barrier between them and my plants.
I planted them in pots, but as a further barrier I put them up on a wire netting frame about two feet off the ground.
And so far, so good, the plants are surviving nicely.
Soon I will be making basil pesto using the same recipe as I make for rocket pesto.


In the background is my asparagus bed but more about that later!

- Posted using BlogPress from my iPad

Blackbirds making a mess of garden beds and paths. A solution!

I love birds in the garden but the blackbirds make a huge mess of my paths and garden borders. As fast as I mulch my garden beds and my pot plants they spread the mulch everywhere over paths and verandas in their search for worms. This really defeats the whole purpose of mulching as well as making a huge mess.
I have finally defeated them!
As I have said before I keep things in case they will be useful in the future. I had kept some cheap plastic gutter guard that had never really worked. So what I did was stretch this along the garden edge and peg it down with some small tent pegs ( but wire looped over would also work).


I lightly covered the mesh with some mulch so that you could not see it but not enough to make the blackbird interested.


Days later the path is still clear!


And for pot plants I found that I had kept some small offcuts of the fine wire used for repairing screen doors. So I just cut that to the size of the pot and put it over the mulching in the pot and I am a winner here too!


Posted using BlogPress from my iPad

Growing Rocket

Rocket has to be the easiest thing to grow. Snails and slugs are not really keen on it unlike soft lettuce varieties.
The rocket plants in the picture below have gone to seed and I will let them dry off.


Once these are dry I either do one of two things. I throw them on the garden where I would be happy for them to grow.


Or alternatively I hang the plants, seed heads down, in an old pillowcase to collect the seeds. Then I keep them in a clean airtight jar for planting.
Like Chard I have pockets of rocket all over the garden. And I start new plantings every few weeks to ensure a continuous supply.

Not sure if it is called rocket because it grows at rocket speed!


The flowers are pretty and edible and look great in a salad!


Posted using BlogPress from my iPad

Tuesday 13 November 2012

Rocket Pesto


Freshly picked rocket

I just picked a huge bunch of rocket from my garden so I'm going to make up a batch of my rocket pesto.

Food processor

I put the roughly chopped rocket into my food processor. Now I love garlic so I add two crushed big cloves. It is worth mentioning here I don't have a partner so I'm fine but you might want to tone the garlic down! It's up to you. Then I add a small handful of lovely South Australian almonds, a good slug of a local cold pressed olive oil and some good salt.


Yum!


Turn on the processor and let it do it's thing! I often add a bit more olive oil depending on how it looks.

Now the taste test. Whilst I would love crusty fresh bead, I am trying to diet so I have become addicted to organic thin corn cakes!


Pass the wine!

In my crazy logic, the calories I have saved on not having bread can now be used on a good dollop of Adelaide Hills Udder Delights famous goat curd. Pass the wine please!
Bottled pesto

Transfer what you have made into a clean sterilized jar with a tight fitting lid. This will keep for about a week in the fridge. For a really quick meal cook some pasta, drain it and then stir a tablespoon of the pesto through the warm pasta. Put your favorite cheese on top and stand back for the compliments!


Rainbow Chard Pasta Sauce


I have so much rainbow chard in my garden so I'm thinking up lots of ways to use it. Today I'm making a rainbow chard pasta sauce fresh from the garden!

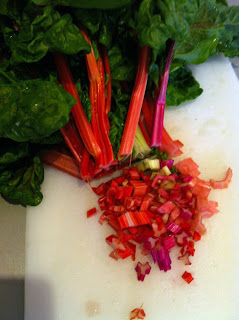
Fresh from the garden

Freshly picked chard! I will rinse this off now in a bucket so that I can save the water for my pot plants as it is rainwater and precious now that summer has begun!

Chopping
Chop the stem parts finely if you want to use them so they will cook properly.
Chopped leaves
You don't have to be as fussy when chopping the leaves but be sure to discard any really tough stems if you find any. This pan is very full but it will cook down. I will only add about1 cups of water. I don't add salt but if you usually add salt to your veg then do so or wait to add salt when you make this up in a recipe.
Cooked and drained
This is the cooked and drained product. It really cooks down a lot! You can freeze it into small plastic bags for later use in sauces and soups. When you defrost it drains off any more liquid that comes out as it thaws.

Cooking onion for the sauce
Chop two onions and fry them in a little vegetable oil with two cloves of crushed garlic and some good salt. I like Australian lake salt, which is harvested from a 4 million year old natural salt lake situated in the remote regions of western Australia. 
Add about half the cooked spinach and continue to fry for about five minutes whilst stirring to make sure it does not catch.

Add tomato sauce
I am quite a fan at present of Woolworths Macro Brand Organic Diced Italian tomatoes so add a tin (I freeze my own tomatoes to use in recipes like this but have almost run out!). In summer I will show you my easy ways to make tasty tomato bases to freeze to add to things.
Add one sachet of tomato paste. I use the Leggos no added salt ones. I use the sachets because I found I wasted too much if I bought the jars!

Cooking
Continue to cook over a low heat, stirring often as it might catch. Taste it now to see if it needs more salt to your taste but here is the secret ingredient... Add two level teaspoons of sugar! Yes I was skeptical at first too! Stir it through and now taste it again. It just takes away the super sharpness of the tomatoes.
Pecorino Cheese

This is a very nice chilli pecorino that I am going to use but any parmesan or pecorino grated or shaved is your choice.
Now cook some of your favourite pasta, top it with a generous spoon of the sauce and top with cheese!

Dinner is served!
 Very easy to make and very tasty! It's also ideal for vegetarians and even vegans if you don't use cheese.

Enjoy!


Strawberry Disaster

I watch lots of garden shows and read lots of gardening magazines for tips and ideas. This one sounded good in principle but has not worked at all. This has been one of my failures. The idea was to line a pallet with hessian or something similar and fill it with compost. Next step is to make pockets and plant the strawberries in the pockets.


I thought it sounded great in theory and would solve the millipede problem and be easy to net. Wrong! Well it would be easy to net and I don't have millipedes because I don't have much fruit either. When we first put it up we had it too upright. So whilst the top plants got water the rest missed out. Then I put it on more of an angle then the top doesn't hold much water and the rest still didn't get much water. It hasn't worked. 


If I had used my brains I would have realised that unless you put drip lines inside the pallet water was never going to get there. And it would waste water so I will be dismantling this and planting the strawberries in containers. 


Ah well, we live and learn!


I do however have lots of strawberries growing in other parts of my garden but they are not netted and I think they are the birds share of my garden bounty! However the biggest problem is Spanish millipedes.


These loathsome creatures were accidentally introduced to Australia about 20 or 30 years ago and have devastated many crops. As soon as the strawberries show any colour they invade. They hollow the strawberry out so there is just a paper thin shell left. 

They have no natural predators here, the birds won't touch them and they live in soil and mulch as they love damp places. So I have planted my strawberries in containers so that they are off the ground (easier for picking too) and I can net them. These are in the upside down lid of an old barbecue. And it is working well!


Sometimes things work and sometimes they don't but gardening is always a learning process!


Monday 12 November 2012

My Australian Kitchen Garden


"If you look the right way, you can see that the whole world is a garden." - F. H. Burnett

My Kitchen Garden


Vegetables and flowers all in together. Nature doesn't do straight lines and dedicated garden beds so neither do I!


Growing Potatoes in Bags

There is nothing that tastes nicer than baby potatoes freshly dug, cooked in their skins and then lightly tossed in olive oil or butter and chopped fresh herbs like parsley and chives or mint.

I have been successful growing potatoes before on other properties but here we have two problems . One is that the garden wildlife digs them up and eats them no matter what I do. The second problem is we have to rely on river water for irrigation and since we share the water with fish, yabbies and other wildlife once the river gets low in summer there is no more water except for our rainwater tanks.

So this year I decided to try something different. I had bought a number of bare rooted trees that came in strong plastic bags so I decided to put these to good use as potato growing bags. I also had some horse feed bags that I could use. ( I have since seen gardening shops advertising purpose use bags to do this but these are free and I hate waste and like reusing things!).

Potatoes in horse feed bags


Whilst one of the problems I had was not wanting to waste water, I also had the problem of needing good drainage, since potatoes will rot if they get too wet. I already use mushroom compost for mulch in the garden so I decided to line the bag with mushroom compost so that would hold the moisture. I then put in a layer of dirt about 15 cm deep with some well rotted organic fertilizer mixed in. Then I cut up my potatoes that had already begun to sprout. I cut them into about three pieces making sure each piece had sprouted. I put the three pieces in the bag and then just covered them lightly with soil.


Growing Potatoes in Bags

As soon as the new leaves showed I kept building up compost, soil or straw around the shoots with the leaves until the bag was full. I watered sparingly as I didn't want it to get soggy. As you can see my plants are now well over the top of the bag and are hopefully setting potatoes under the ground. I now have to wait for flowers to appear on the plants and then the tops will die and I can pick the potatoes. 


It is really important that I don't overwater at this stage as the potatoes will rot. Lots of books say you can't use potatoes to grow that you have bought for eating. I have read that some potatoes are treated so that they won't sprout but as I only buy organic unsprayed potatoes to eat I can't see the problem. When I visit my daughter I raid her vegetable bin for any forgotten organic potatoes that have begun to sprout. My plants do look lovely and healthy but I will just have to wait and see if this has been successful. I will let you know how it goes!


Sprouting


Have a lovely gardening day!

Y x